
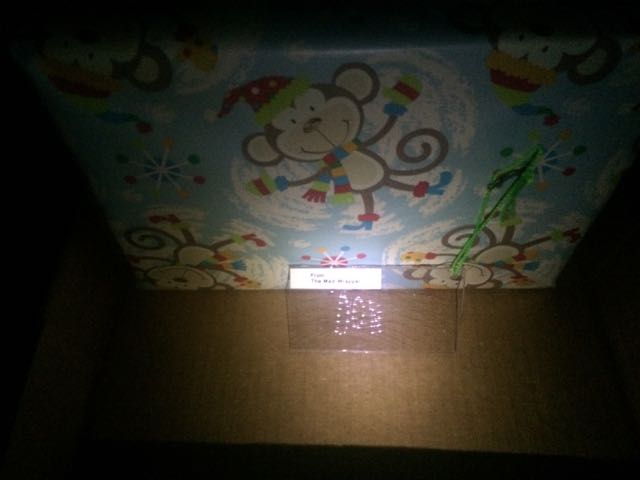


A scratch hologram is one of those “hidden in plain sight” tricks. To see the message just angle the glass toward the sun and presto! This is an excellent way to hide your secret message with an extra WOW factor. It is surprisingly easy to make. It’s inexpensive and relatively quick to make.
A big shoutout goes to bakergk for the excellent scratch hologram instructions posted at the Instructables website. I basically built his Scratch Hologram instructable exactly step for step then converted it into a gift tag.
Supplies
You will need:
 6-inch dowel
- sewing pin
- push-pin
- small nail
- super glue
- drill
- 8×10 sheet of thin Lexan (makes 10 2×4 inch name tags).
Make a Compass

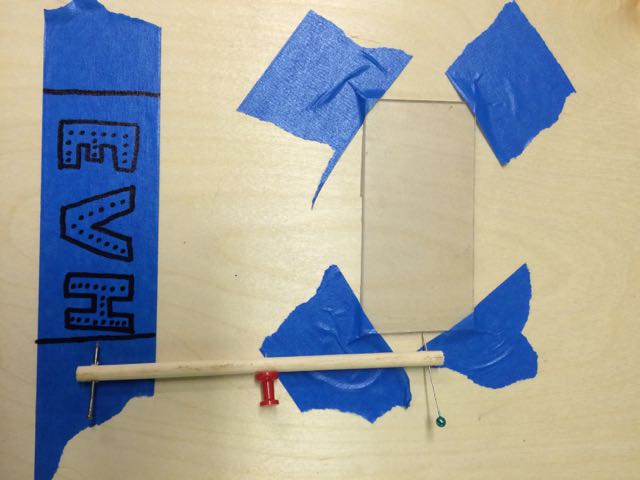
You can either buy a good quality compass with two sharp points or you can make one. The best option is to make your own. There are various reasons for this: 1) it’s easy to make, 2) it is cheap to make, and the most important feature 3) the homemade compass will never slip and change size in the middle of your project.
- Cut a small wooden dowel so it is roughly 6 inches long.
- Drill a very small hole through it near one end and insert a small nail that has been coated with super glue
- dip a sewing pin in super glue and push it through the dowel at the opposite end from the nail.
- dip a cork-board push-pin in super glue and push it though near the mid-point of the dowel
- Wait until the glue fully dries.
- Tug at the pin and nail to verify that the glue is dry so nothing moves while scratching arcs.
Scratch a Hologram
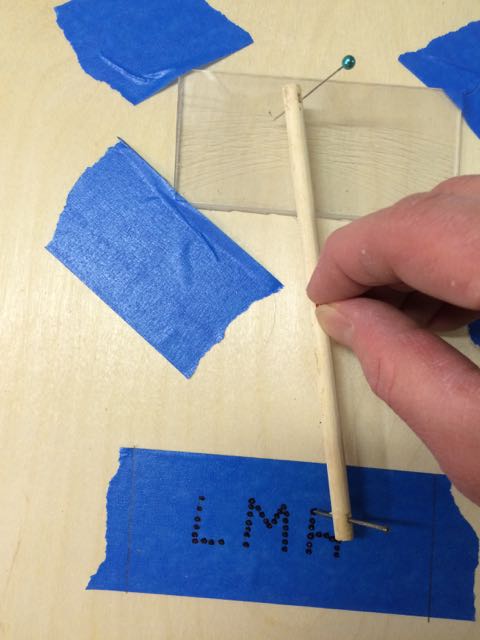
- Stick a 2″ by 5″ piece of masking tape to a surface such as a piece of plywood.
- Place the Lexan plate on the masking tape and draw two pencil lines to record the dimensions of the plate.
- Slide the plate roughly 5″ away from the tape on the plywood. Using the compass, position the bottom corners exactly 1 compass width from the bottom edge of the tape using the pencil marks.
- Securely tape down the corners of the glass so it will not move during the scratch process.
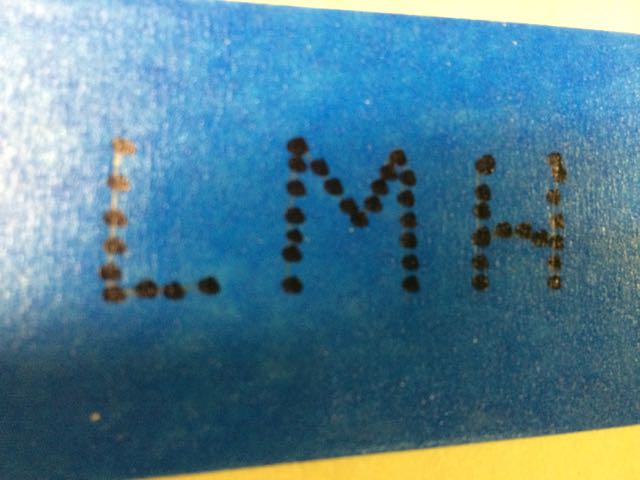
- Using the pencil, draw evenly spaced letters between the lines on the tape.
- With a sharpie marker make a dot every 1/8 inch along the drawn letters.

- Place the nail on the first dot
- With the pin end, lightly draw an arc all the way across the hologram plate.
- Move the nail to the next dot.
- Draw another arc. Again: VERY lightly.
- Repeat for every dot.

Finishing touches
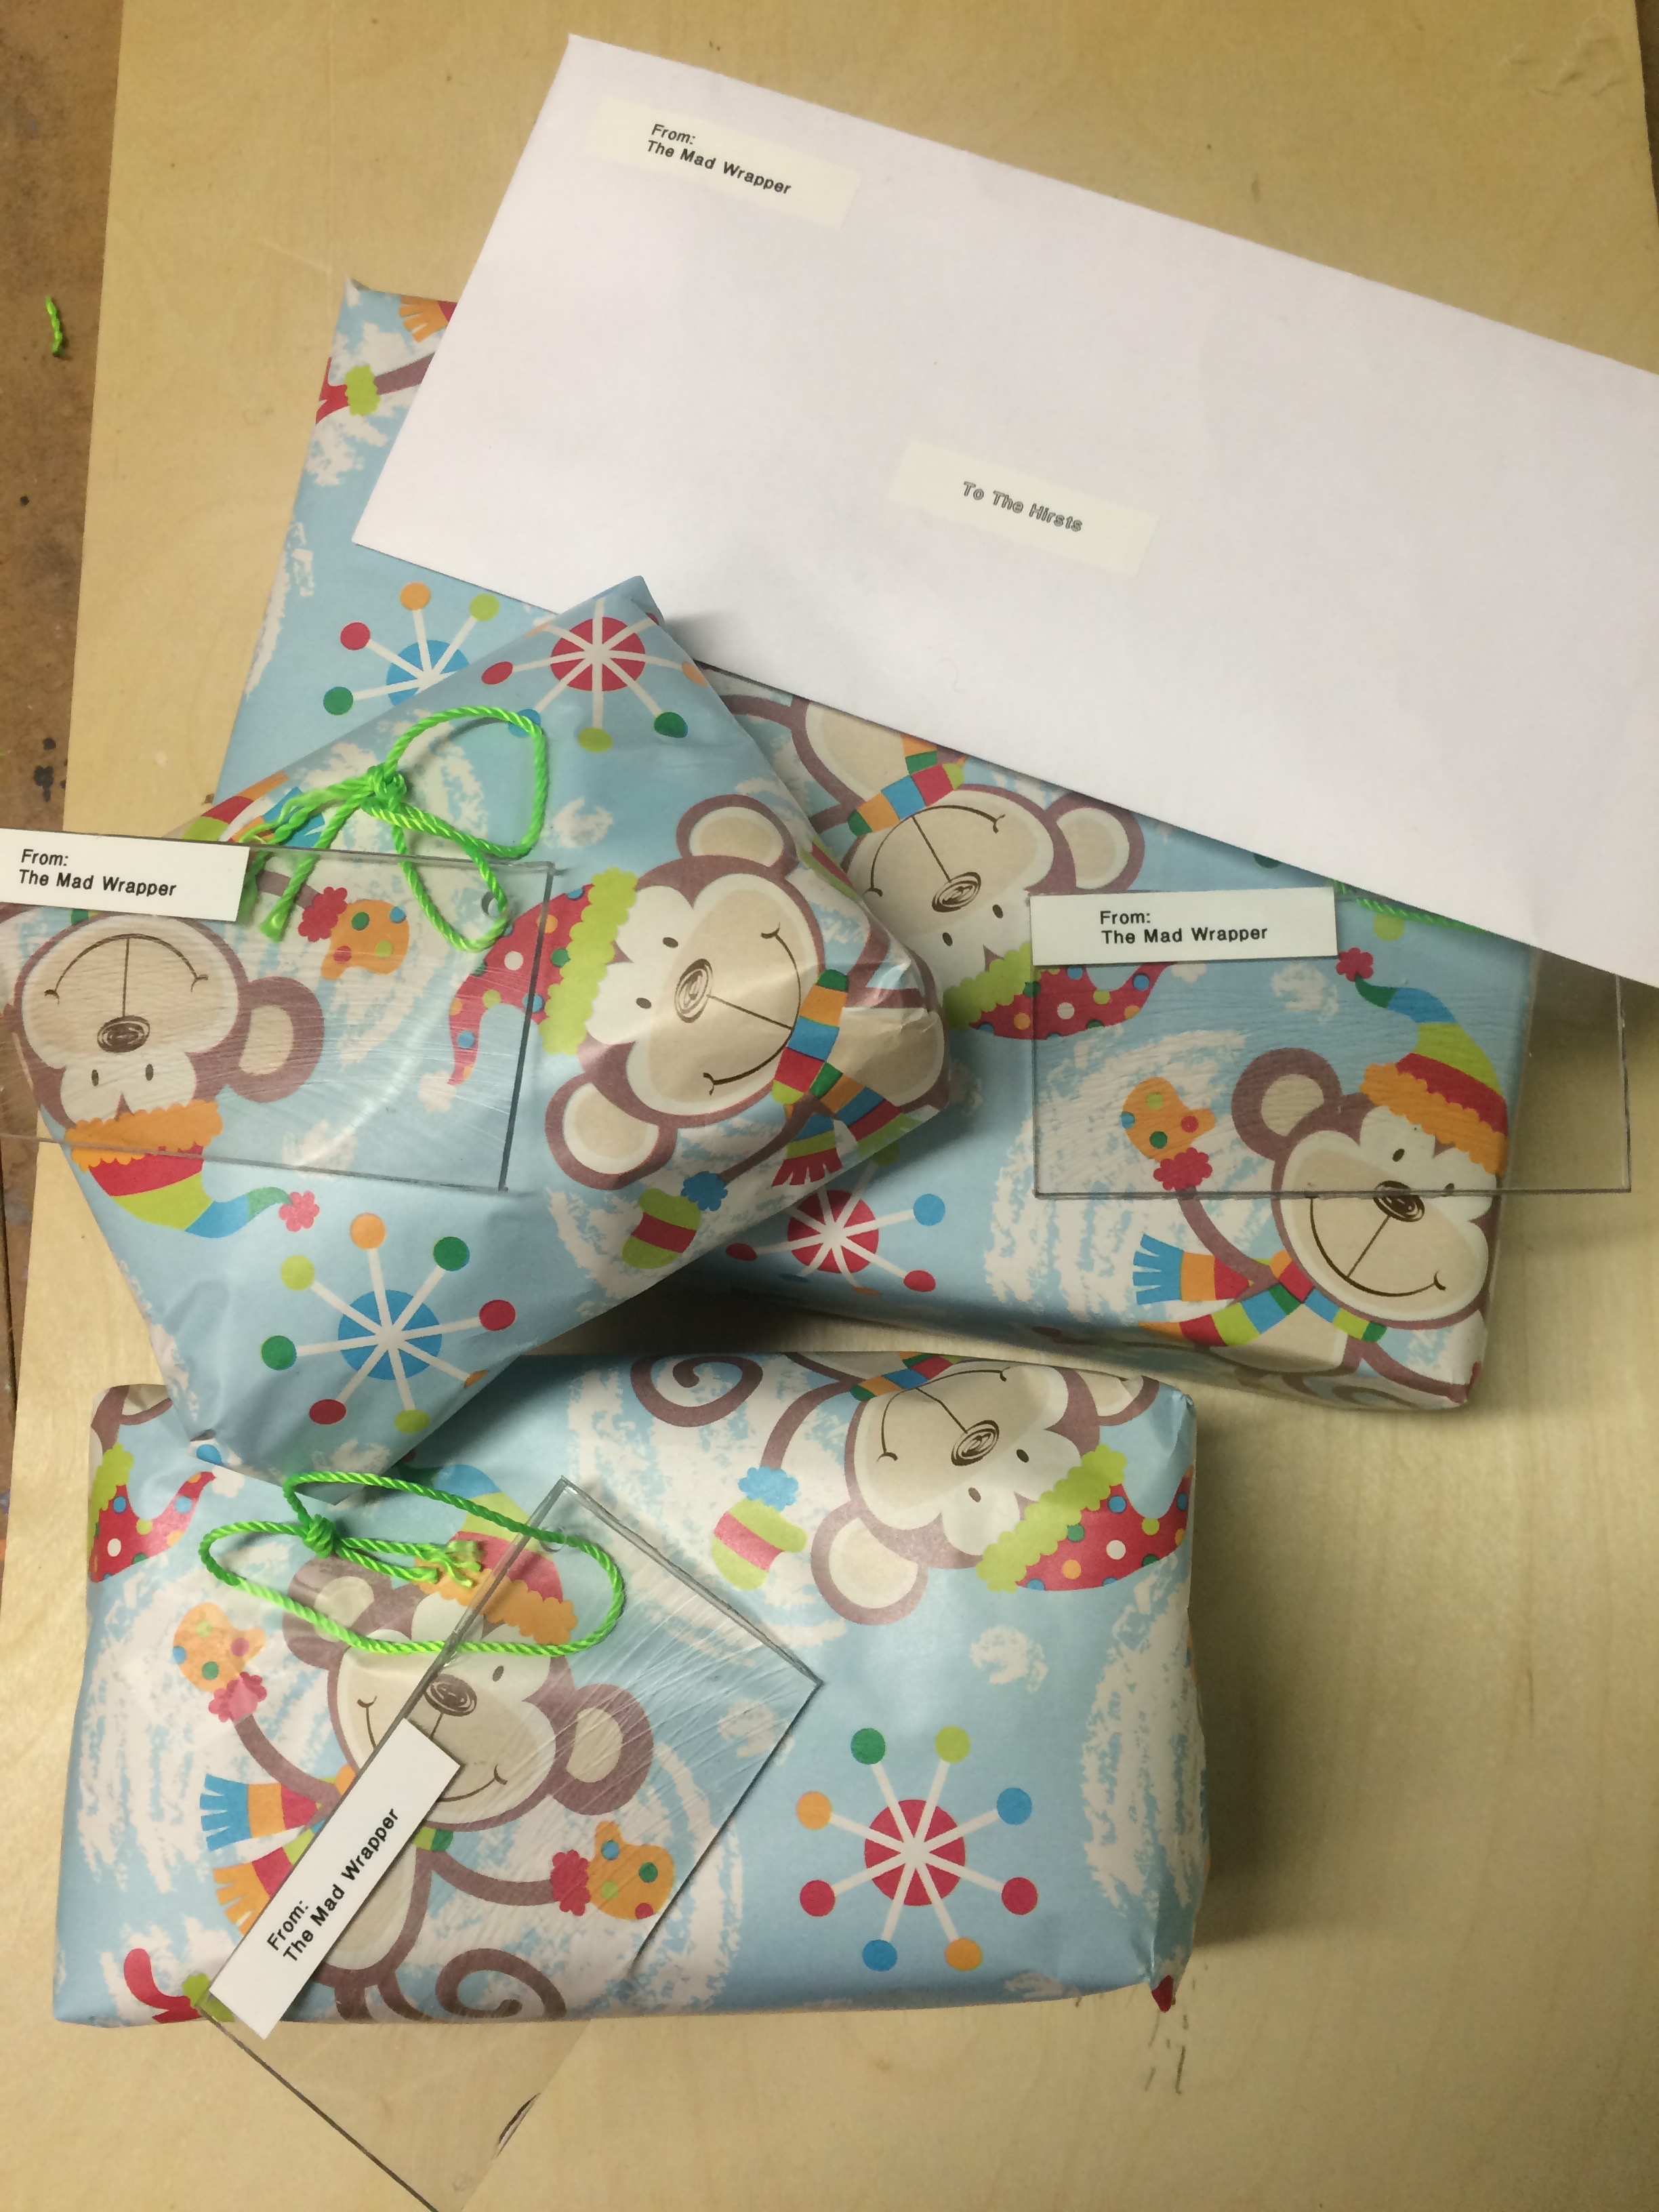
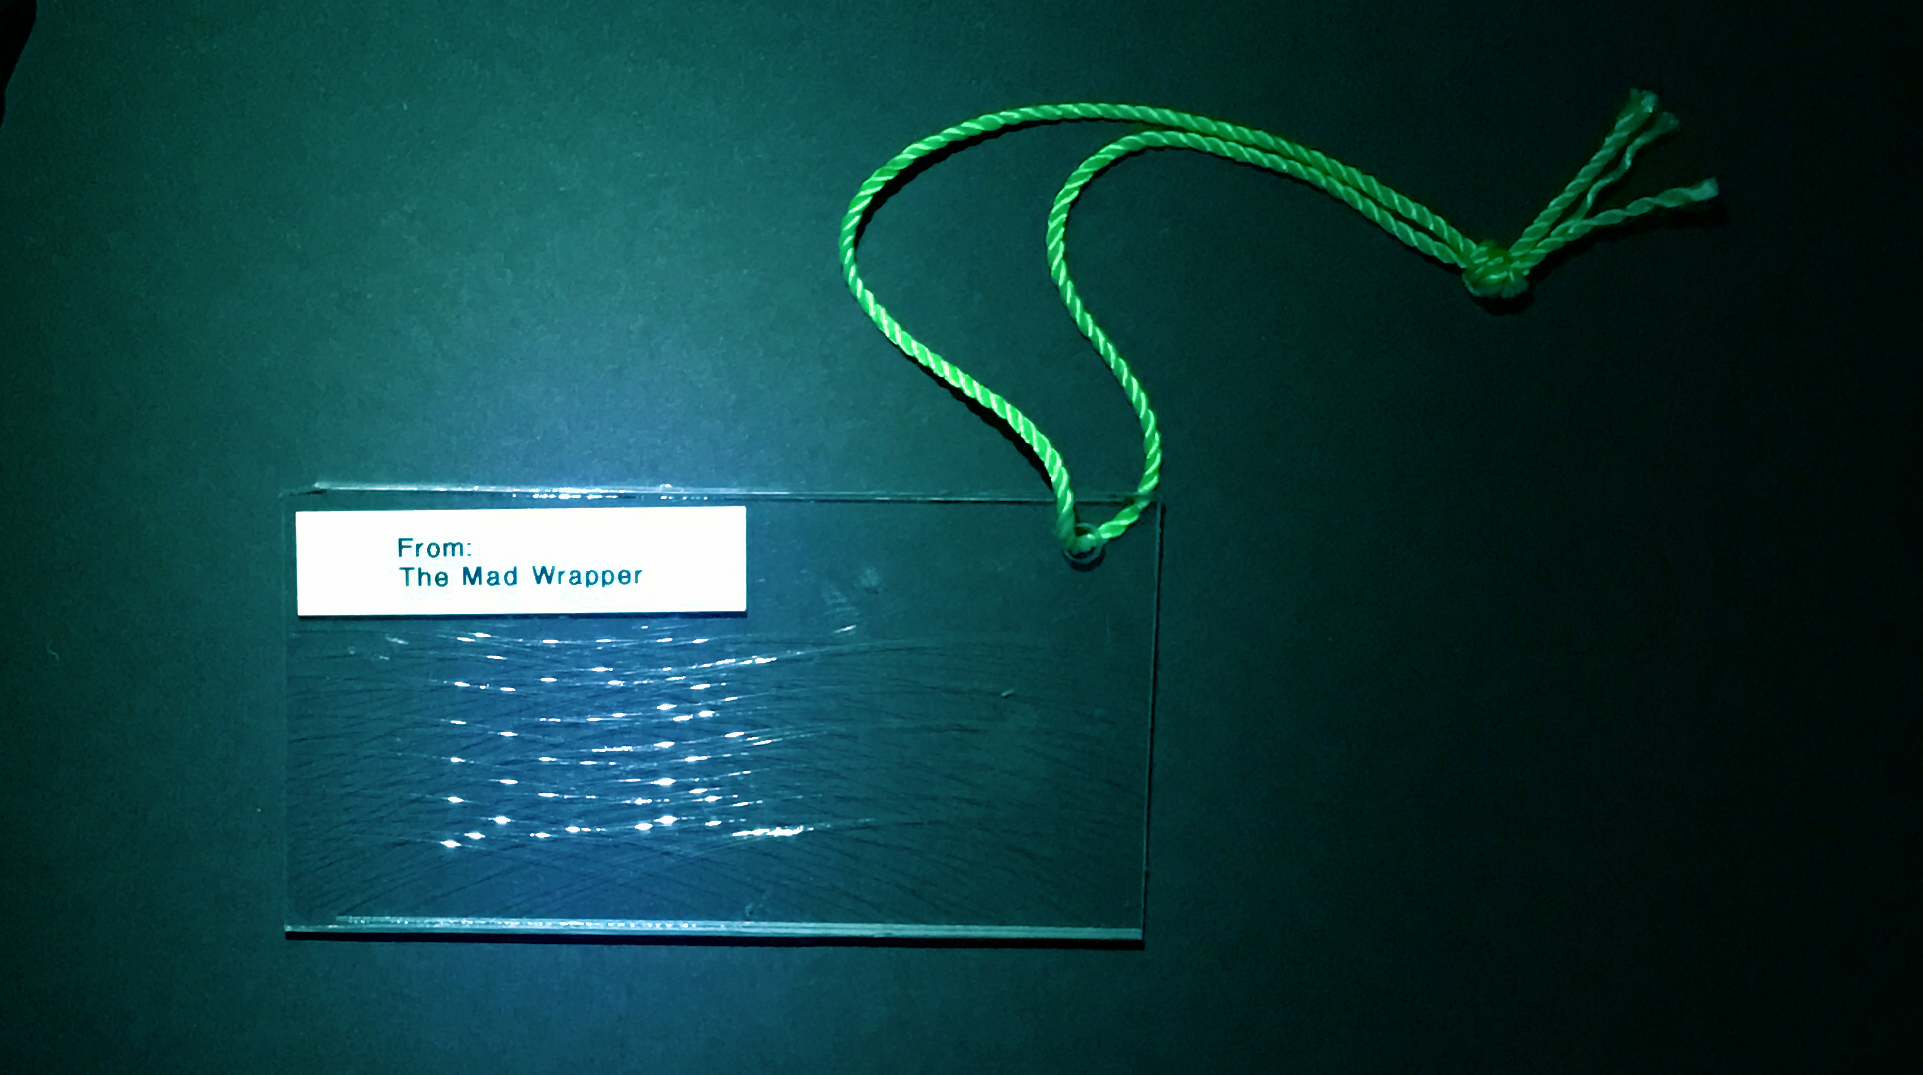
- Drill a small hole in the upper corner and tie a loop of string through the hole. The string will later be taped to the gift.
- Use a label maker to create a table “From: The Mad Wrapper”. Attach this to the other upper corner of the plastic plate.
- Attach the name tag to a gift and place it under the tree.
Create some directions
Like most of the great Mad Wrapper wrappings, it is not initially obvious for the average Christmas partygoer to figure out how to read a tag. It is always best to create some directions. You can type up some simple (dry) instructions if you want. I look forward to the opportunity to be creative. Sometimes I will make a poem or song to sing, or some crazy prose to lead the guests through the process of figuring out the tag. Attached is a bullet-list steps that include rock’n and roll’n, and hula-hooping hips in front of a sunny window.
-TMW